Wednesday, August 31, 2011

AB #10 - Blueberry Cheese Tart

I'm beating the time to participate in the Aspiring Bakers #10 - Easy as Pie hosted by Janine of Not the Kitchen Sink. You see, I've only finally decided to bake the blueberry cheese tarts at the 11th hour (i.e 10.20pm to be exact!)Although I did prepare the blueberry fillings on Tuesday which is a PH, I didn't think I have the time to do any baking during the week.

Whilst writing this post, the tarts are still baking in the oven. I will be snapping some pictures later, do a quick edit and upload it here.


The blueberry cheese tart is the 2nd time I'm baking it (the last was June 2009). I didn't realise how time flies and without this blog to journal my baking journey, I would have thought that I did it just last year! That's a pretty long time for me to re-bake such a wonderful recipe.

In my haste of baking, I accidentally dropped and broke my beloved & sentimental mixer (heart-break as well). Told T about it and that I would have to throw it away, but he said that "something with sentimental value is for keep-sake though it can't be used anymore". Very true. I'm contemplating now.


Blueberry Cheese Tarts


(makes 36 mini tartlets)


Ingredients/ Method:


Pastry:
125g butter
50g fine granulated sugar
250g plain flour
1 egg yolk
1/2 tsp vanilla essence
1 tbsp COLD water

1. Sift flour and sugar into mixing bowl.
2. Rub butter into flour until resembles coarse crumbs (rubbing method).
3. Add in egg yolk, vanilla and water.
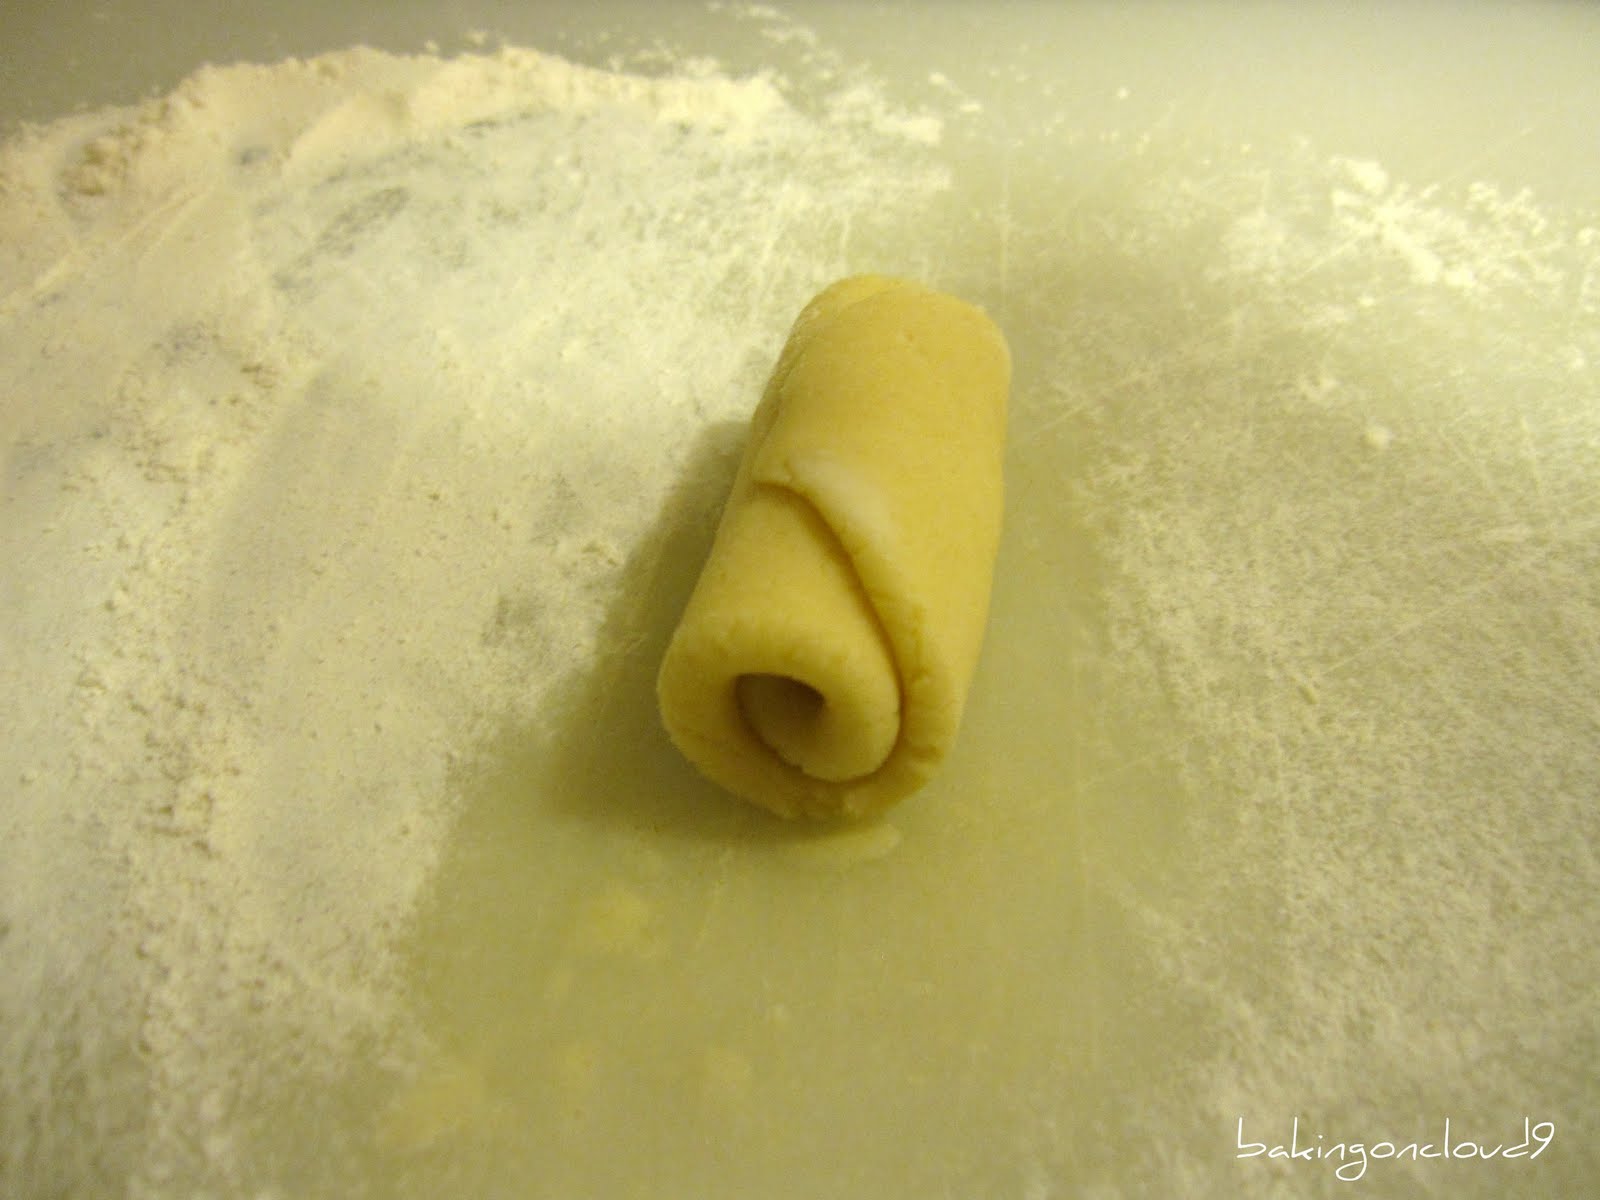
4. Shape dough into ball and refrigerate (20-30 minutes) before using** (before using, take out from fridge, wait for awhile until dough soften).
5. Place dough onto tart shells, and pooked the base with fork (this is to let the air comes out while baking).
6. Bake at 160-170'C for 10-15 minutes or until brown.

Blueberry Filling:
125gm fresh blueberries
1 tsp sugar

1. Bring blueberries and 1 teaspoon sugar to simmer in small saucepan over medium heat.
2. Cook, mashing berries with spoon several times and stirring frequently, until berries have broken down and mixture is thickened and reduced to ¼ cup, about 6 minutes. Transfer to small bowl and cool to room temperature, 10 to 15 minutes.

Cream Cheese Filling:
250g cream cheese
20g butter
50g fine granulated sugar
1 egg

1. Beat cheese, butter and sugar together until fluffy.
2. Add in egg and beat till well mix.
3. Pour mixture onto baked tart shells.
4. Spoon some blueberries or blueberry pie filling onto unbaked tarts, and use a toothpick to create swirls.
5. Bake at 170-180'C for 10 minutes.


Sunday, August 21, 2011

The best blueberry muffins & pancake

During my 3-weeks getaway in States, other than making lao po bing, I also had my hand on the Best blueberry muffins and soft fluffy pancakes. My original plan was to bake-like-crazy when I'm holidaying at my sis' place, if we had only stayed at her place. But we decided to have a week stay at her house "doing nothing", and another 2 weeks on road trip from central States heading westward to San Francisco. For the last decade that my sis left S'pore for States, this is our first time visiting her together with my dad & Zakris; my gf E tagged along as well. My regret is that my mum didn't get the chance to see the well-being of my sis in a far-away land, and I do not want to have another regret that my dad didn't get to do it too! It was definitely a good trip but it won't be the last for sure! I'm already planning another trip in 2013, and to see my 1 year+ niece then!

When I saw the big array of baking tins, tools, ingredients, spices, pots & pans etc left me & my friend in awe! Even the sugar and salt are particular! The kitchen is so well-equipped that you can bake anything almost anytime. For someone who don't cook at all before she left S'pore, it's a pleasant surprise!


The blueberry muffin recipe is highly recommended by my sis, and with the lemon-sugar toppings, they are luxurious to the bits. The only problem I had was the measurement used - cups, half stick butter, etc.


Blueberry Muffins
(Recipe adapted from Hooney's The Best Blueberry Muffins)
Makes 12 muffins.
Ingredients/ Method:

Lemon-Sugar Topping
1/3 cup sugar (I used Turbinado Sugar)
1 1/2 teaspoons finely grated zest from 1 lemon
Muffins
2 cups fresh blueberries, picked over
1 1/8 cups sugar plus 1 teaspoon
2 1/2 cups unbleached all-purpose flour
2 1/2 teaspoons baking powder
1 teaspoon table salt
2 large eggs
4 tablespoons (1/2 stick or 56.5gm) unsalted butter, melted and cooled slightly
1/4 cup vegetable oil
1 cup buttermilk (may substitute with 3/4 cup plain whole-milk or low-fat yogurt thinned with 1/4 cup milk)
1 1/2 teaspoons vanilla extract

FOR THE TOPPING: Stir together sugar and lemon zest in small bowl until combined; set aside.

FOR THE MUFFINS:
1. Adjust oven rack to upper-middle position and heat oven to 425 degrees F (or 218 deg C).
2. Spray standard muffin tin with nonstick cooking spray.
3. Bring 1 cup blueberries and 1 teaspoon sugar to simmer in small saucepan over medium heat.
4. Cook, mashing berries with spoon several times and stirring frequently, until berries have broken down and mixture is thickened and reduced to ¼ cup, about 6 minutes. Transfer to small bowl and cool to room temperature, 10 to 15 minutes.
5. Whisk flour, baking powder, and salt together in large bowl.
6. Whisk remaining 11/8 cups sugar and eggs together in medium bowl until thick and homogeneous,about 45 seconds.
7. Slowly whisk in butter and oil until combined.
8. Whisk in buttermilk and vanilla until combined.
9. Using rubber spatula, fold egg mixture and remaining cup blueberries into flour mixture until just moistened. (Batter will be very lumpy with few spots of dry flour; do not overmix.)
10. Use ice cream scoop or large spoon to divide batter equally among prepared muffin cups (batter should completely fill cups and mound slightly).
11. Spoon teaspoon of cooked berry mixture into center of each mound of batter.
12. Using chopstick or skewer, gently swirl berry filling into batter using figure-eight motion.
13. Sprinkle lemon sugar evenly over muffins.
14. Bake until muffin tops are golden and just firm, 17 to 19 minutes, rotating muffin tin from front to back halfway through baking time.
15. Cool muffins in muffin tin for 5 minutes, then transfer to wire rack and cool 5 minutes before serving.


As we had to settle our own breakfast during the first week of our stay (both my sis & bro-in-law were out at work on some days), we created "chaos" in the kitchen. One of the brekky items I prepared is the soft & fluffy pancakes. I like how easy it was to prepare and the result is real good. This is a keeper!

Fluffy Pancakes
Recipe adapted from Wen's Delight)

Ingredients/ Method:
150g Self raising flour
50g Sugar
1/4 tsp salt
110ml Fresh milk
1 egg
1 tbsp Corn oil

1. Mix flour, sugar and salt in a mixing bowl.
2. Add in egg, milk and corn oil, use a hand whisk to stir well.
3. Spoon batter onto a non-stick pan (without oil) to pan fry until golden brown on both sides.
4. Serve hot with maple syrup/jam.


Lao po bing (Wife's biscuit) & POP

This is my longest break from blogging and I was almost contemplating to neglect it totally. I'm so sorry if anyone is waiting for an update on this 'pathetic' blog, that is if there is anyone LOL. I can't promise a regular posting but will try my best to keep my hobby going and this blog alive.

Actually, there are a couple of recipes that I will be posting, but this Lao Po Bing "step-by-step" will take priority as it's a long overdue request & promise. I only managed to get it done whilst I was on my 3-weeks holiday at my sis' place in US. This recipe originated from Florence's Do What I Like, but it seems that the post cannot be found in Florence's blog anymore.


Ingredients/ Method:
Water dough
100g cake flour
25g icing sugar
25g butter (cubed) or shortening or margarine or lard
40g water
Oil dough
100g cake flour
45-50g shortening or lard
Filling
50g candied winter melon, chopped to bite size
55-60g castor sugar
70g commercialised glutinous rice flour (koh fun)
18g shortening
15g white sesame seeds, roasted
12g dessicated coconut (can be omitted)
120g boiled drinking water, room temp.
Egg Wash
1 yolk + 1 tsp water + a pinch of salt


1. Pastry:
Water dough: Rub butter into sieved flour and icing sugar till breadcrumb-like. Add in water till a pliable dough is formed. Cling wrap dough and rest for 30 to 45 mins. Divide dough into 12 equal portions.


Oil dough: Rub shortening into flour till well mixed. Cling wrap and leave it aside to rest for 30 to 45 mins. Divide dough into 12 equal portions.


2. Filling: Put all ingredients into a big bowl, mix till well combined. Divide filling into 12 equal portions.


3. Flatten a piece of water dough. Place a piece of oil dough in the centre of water dough.

4. Wrap oil dough with water dough.


5. Press and roll out dough into a longish flat piece with a rolling pin. (I didn't do a good job here.)

6. Roll it up like swissroll style.

7. Turn the dough 90 degrees.


8. Roll it into a longish flat piece.
9. Roll it up like swissroll style again.

10. Pinch the 2 side edges.

11. Using hand, shape it into a flat circular shape.

12. Place the filling in the centre of the flatten dough.

13. Wrap up the filling with the dough. Ensure dough completely covers the filling.

14. Using hand, roll the dough to make it like a round ball. Then flatten it with a rolling pin. Egg wash the dough.

15. Bake in pre-heated oven at 200 deg C for 20 to 25 mins or until golden brown.


POP (Pig Out Party)

Just last Saturday, I attended my 2nd bloggers' party which was initiated by Eelin and it was held at Jo's cosy home. In fact, I'm surprised initially with the invitation but very happy that I got invited. Since my baking bug hasn't returned, I'd chosen to bring tau suan instead of baked stuff. All my other blogger friends put in so much efforts and brought along super sumptuous and tempting homemade TLC cakes, puffs, ice-cream, pizza, fried fritters, chwee kueh, and alot more. The gathering was very enjoyable and I look forward to another one soon. I promised to do a proper dish the next time! You can visit the wonderful blog of my friends here, plus many of them have put up pictures that will make you salivate & envious of our POP party.

Eelin of The batter baker
Jo of Sugar & everything nice
Edith of Precious moments
Jane of Passionate about baking
Doris of Tested & tasted
Jess of J3ss kitch3n
Zhou Yuan of Baking library
Grace of Kitchen corner
Bee Bee of Honey bee sweet
Cathy of Cathy's joy

Sunday, April 24, 2011

Souffle cheese cupcakes

It has been a long time that I've updated my blog. During this period of absence, I've done very little baking. Not too sure what I had been up to, but I'm left with little time and energy to bake after busy work week, dramas. It also doesn't help that I've no idea what I want to bake.


Whatever, I've a block of cream cheese that's going to expire very soon, and also that my younger brother had organised a housewarming on Good Friday, it seem a perfect calling for me to bake something on this day. This 'something' took a while to conceive as I'm totally clueless these days ~~ but definitely has to include cheese ~~ which is this month Aspiring Bakers #6: Say Cheese, hosted by Noms I Must. It was only till the eleventh hour that I decided to bake and finally deciding on baking this Souffle cheese cupcakes.


I'm happy with the outcome, and my family and relatives like them very much. The texture is very soft and tender, and resembles the Cotton soft Japanese cheesecake that I baked previously. Comparing, this Souffle cheese cupcakes is much easier to prepare and bake than the Cotton soft Japanese cheesecake. Taste-wise, both are equally good.


Souffle Cheese Cupcakes
(Recipe adapted from SeaDragon, with slight modifications)
Makes about 15 cuppies


125g cream cheese
60ml milk
40ml canola oil
3 egg yolks
40g caster sugar (reduced to 25g)
20ml lemon juice (extracted from 1 lemon)
30g cornflour, sifted
3 egg whites
70g caster sugar (reduced to 60g)

1. Preheat oven to 150°C. Place a large tray of hot water inside the oven just below the shelf where the cheesecakes are to be baked.
2. Line 15 muffin holes with paper cups or use cupcake holders.
3. Soften cream cheese with milk and oil in a bowl placed over simmering water, or in a double-boiler. Whisk until smooth, remove from heat and let cool until lukewarm.
4. Beat egg yolks with 25g sugar until combined, beat in lemon juice. Gradually whisk in cheese mixture to combine. Lightly whisk in sifted cornflour, mix well.
5. Beat egg whites until foamy. Then gradually beat in 60g sugar, spoonful by spoonful, until firm but just under stiff peaks stage.
6. Fold 1/3 of the egg white mixture into the cheese mixture until thoroughly mixed in. Repeat two more times with the remaining egg white mixture.
7. Spoon batter into the prepared muffin cups using ice-cream scoop, filling each cup nearly to the rim.
8. Place the muffin tray on the shelf just above the tray of hot water.
9. Bake for 35-40 minutes, or until the tops of the cheesecakes are lightly browned. Test doneness when skewer inserted come out clean.


Monday, March 21, 2011

Cinnamon Buns

I've been meaning to bake my own Cinnamon Buns for ages but never get to do it so far. Recently, there are few bloggers who 'tempted' me again with their hot-from-oven cinnamon buns, you can see from Reese Kitchen, Do What I Like. With some time to spare today, I finally get to bake these delicious cinnamon buns. It is so easy and I'm wondering why I took so long to bake it.

I was enjoying the entire process - from preparing the ingredients to cooking the water roux to mixing the dough and proofing, and rolling, cutting. Not too sure whether am I the only one, but I like the smell of yeast, it totally lift up my spirits! Seeing the 1st and 2nd successful proofing made me super uber happy!


Before 2nd proof.

40 mins later... after 2nd proof

When the buns are fresh out of the oven (almost immediately cos I'm running late on schedule -again!), I grabbed one of them, snapped a few pictures and rushed out of the house. I was munching the bun whilst walking to the bus-stop.


Cinnamon Buns (65 deg C Tangzhong method)
(Recipe adapted and slightly modified from Kitchen Corner)

Water Roux (Tangzhong)
125g water
25g bread flour

1. Cook 125g water with 25g bread flour at medium low heat, keep stirring until becomes thicken and no lumps left. Cook until 65 deg C, or if you do not have a thermometer, cook until mixture resembles baby porridge.
2. Transfer to clean bowl and cover with cling wrap to prevent skin forming.
Note: Water roux can be stored for 2 days, and if colour turn dark grey, to discard.

Dough
(A) 210g bread flour
56g plain flour
20g milk powder
42g sugar
1/2 tsp salt
6g instant yeast

(B) 30g eggs
85g water
84g water roux (refer to water roux recipe as above)

(C) 22g butter

(D) 15g butter, soften
30g brown sugar
1 tablespoon cinnamon powder

1. Put all the ingredients (A) and (B) and knead until it form a dough.
2. Add the butter little by little and continue the kneading process until smooth and elastic and the dough does not stick at the side of the mixing bowl.
3. Proof for 40 minutes in a clean bowl cover with cling wrap.
4. Mix brown sugar and cinnamon powder until well combine. Set aside.
5. Flatten the dough with your hand and roll it out in longish shape with a rolling pin about 25cm x 40cm.
6. Brush butter on the surface of the dough then sprinkle cinnamon-sugar mixture onto the dough evenly.


7. Roll it up like a swiss roll and seal it tightly.
8. Cut into 8 equal portions using lightly floured knife.
9. Place dough in a 9" round cake tin and cover with a cling wrap. Proof for a further 40 minutes. 10. Bake at 180 deg C preheated oven for 15 minutes.


It turned out cottony soft and yummy, and simply easy to churn out. Sweetness is just nice so there is no need to reduce the brown sugar. But if you like sweeter cinnamon buns, more sugar has to be added.


Enjoy over a cup for black coffee - heavenly!

Birthday brunch at Keppel Club

Yesterday, we invited our family members to the Peony Jade @ Keppel Club. The restaurant is open to the public and the weekend dim sum brunch is good value for money at $28++ for adults, $15++ for child 5-10 years old, and free for kids below 5. In addition, the environment is cool! and the place is not crowded probably because of the location. Good service and attentive service staff!

Here's a galore of some of the food we had tried. I didn't manage to take pictures of all food cos they were gone before I could snap them. Other good ones that are not here includes Steamed Meat Dumpling with hot & sour sauce, Beancurd Skin Roll with Prawn & Japanese Seaweed, Deep Fried Prawn Roll with Almond & Mayonaise, Stirred Fried Brocolli with Oyster Sauce.


**Die-die must try!

Soft & fluffy Bao


**Must try, 'wok-full' taste


**This looks plain, but it's very flavourful & fresh! Must try

Delicious & refreshing desert!


Can give this a miss.

Save your stomach for something else.


We were filled to the brim when we left the restaurant. Overall it's a good experience but I find that the desserts selection is limited and not impressive, except for the mango sago. If we could end our meal with a nice round of dessert, it would have been more perfect!

Have a good week ahead!

Sunday, March 20, 2011

Lemon Meringue Cake

Today's my birthday and it started with a long day but wonderful and lovely with lots of people closest to me. Before the DAY, I was busy preparing a birthday cake for myself and ended till the wee hours. Although I had in mind a cake to make, I was deliberating whether to bake or not to bake. Ended up I started baking preparation late in the night (like 9.30pm). So I was practically still baking the cake when the clock striked twelve i.e. on my birthday! And the cake was only frosted in the morning, just before the time we were supposedly to leave the house and picked up my family members for brunch! I was rushing. TL commented that I must have rushed to come to this world. Period.

Being a super inefficient and bad planner me, this was a tedious birthday cake to make. If any other bakers were to see me in this state, they would probably looked in exasperation. One thing for sure, I can't bake for a living, hah!


Anyway, whilst planning for my own birthday cake, I was flipping the new recipe book I got last month - "My Birthday Cake" by Kevin Chai. The pictures are all alluring but I finally decided on a Lemon Meringue Cake because I was left with 3 lemons sitting in the fridge for ages. Ironically, I did not followed the recipe in the book, the final cake was an assembly of various recipes.

Lemon Curd
(Recipe adapted from The Little Teochew)

60g unsalted butter
200g sugar
2 eggs + 2 egg yolks
120ml fresh lemon juice (from 2.5 lemons)
1 tsp grated lemon zest, or more if you like (depending on how strong you want the flavour of lemon)

1. In a large bowl, whisk all the ingredients except the butter*. Mix well. Place the bowl over a bain-marie** (water bath) and stir constantly. The mixture may look curdled, but it will smooth out as it cooks.
2. If you want a more subtle taste of lemon, do not add the zest at this stage. Set aside with the butter.
3. Once the mixture thickens - it should leave a path on the back of a spoon - turn off the flame and add butter in 2 or 3 additions. If you have not added in your lemon zest, add it in now and stir to mix well.
4. Allow the curd to cool slightly before transferring to a clean jar or bowl. Strained the curd to get a smooth curd. Make sure it is covered to prevent a skin from forming. Chill in the refrigerator. The curd will thicken further as it cools. Covered tightly, it will keep in the refrigerator for a week and in the freezer for 2 months.

Genoise Cake Batter
(Recipe adapted, doubled and slightly modified from Honey Bee Sweets)

86g clarified butter (or unsalted butter)
1 tsp vanilla bean paste
2 large eggs + 1 egg yolk (100g + 18g)
100g caster sugar
66g cake flour
66g corn flour

1. Preheat the oven to 175C.
2. To prepare the butter, in a microwavable bowl, warm the butter until hot. Stir in the vanilla bean paste, cover and keep warm.
3. To prepare the egg mixture; in the bowl of a stand mixer set over a pan of simmering water, heat the eggs, yolk, and sugar until just lukewarm to the touch, stirring constantly with a long handled whisk to prevent curdling.
4. Immediately remove the bowl to the stand mixer and attach the whisk beater. Beat on high speed for a minimum of 5 minutes. It will more than quadruple in volume and very thick and airy.
5. Remove almost 1/2 cup of the beaten egg mixture and whisk it thoroughly into the melted butter.
6. Sift about half of the flour over the remaining egg mixture, fold it in gently but rapidly until almost all the flour has disappeared. Repeat with the remaining flour until all traces of the flour have disappeared.
7. Fold in the butter mixture until just incorporated. Make sure you reach into the bottom of the pan to be sure to moisten all the flour.
8. Pour the batter into the prepared 7" cake tin.
9. Bake for about 30 minutes, or until golden brown and the skewer inserted into the cake came out clean.
Note: To prevent the collapse of its delicate foam structure, while still hot, the genoise must be unmould as soon as it is baked.

Meringue
(Recipe adapted from My Birthday Cake by Kevin Chai)

70g egg whites
60g caster sugar (reduced from 70g)
40g ground almond
25g dessicated coconut
10g plain flour

1. Beat egg whites until soft peaks form.
2. Gradually add in sugar, continue beating until stiff peaks form.
3. Combine ground almond, dessicated coconut and flour, and fold into egg white mixture.
4. Spread meringue onto 2 sheets of 7" diameter of round greaseproof paper.
5. Bake at 170 deg C for 25 mins or until golden brown.

Crystallized Lemon
(Recipe adapted from My Birthday Cake by Kevin Chai)

Half a lemon (sliced) - this is what I had left
50g caster sugar
25ml water

1. Bring sugar and water to boil.
2. Add in lemon slices and continue to cook on low heat until sugar thickens.
3. Remove and leave to cool.

Lemon Curd Cream
1 cup whipping cream
Slightly more than 1/4 cup lemon curd

1. Whisk whipping cream until stiff peak.
2. Add in lemon curd into whipped cream and continue to beat at low speed until well combined.
3. Stored in fridge until ready to use.

Assemble the Cake

  1. Slice the cake into 3 portions.
  2. Spread lemon curd cream onto a slice of cake and sandwich with meringue.
  3. Continue step (2) and cover with another slice of cake.
  4. Coat the entire cake with remaining cream.
  5. Decorate crystallized lemon slices onto the cake.
  6. Pipe lemon curd on the cake in any design.


Unfortunately, the genoise sponge cake did not work for me this time and I strongly believe it's because I didn't manage the techniques required. The texture was densed although not dry. I must work very hard to get THE sponge cake. Overall, the combination of lemon curd/cream, genoise sponge cake and meringue is a twist to a conventional cake, rather refreshing I would say. As usual, my family members are very supportive and finished up the cake!


I'm submitting this to Aspiring Bakers #5: Fruity March hosted by Jess of Bakericious.