Sunday, October 30, 2011

Purple Sweet Potato Ang Ku Kueh (红龟粿)


As mentioned earlier, I'm not into making kueh-kueh so far because of its perceived difficulty, and especially if it calls for homemade paste-like fillings. Until now that AB's theme is traditional kueh that I started 'looking seriously' into kueh recipes from books as well as many wonderful blogs.


There are many recipes that caught my eye, especially this purple sweet potato ang ko kueh from Frozen Wings and Honey Bee Sweets. I'm sold! I love the purple hue, and what's even more comforting to know is that the colour is 100% natural from the root, no addictives! Since I've have some left-over lotus seed paste from my earlier hakka pumpkin kueh post, it makes life easier (haha .... being lazy). Like HBS, I love peanut fillings ang ku kueh, so this would be next on the list. Of course, the mung bean fillings seems pretty easy & straight-forward to prepare, so I would give it a try too!


Ingredients/ Method:
(Recipe yields 24 pieces)
Purple sweet potato ang ku kueh skin
200g sweet potato, steamed and mashed
300g glutinous rice flour
1 tbsp rice flour
2 tbsp caster sugar
4 tbsp cooking oil
200ml water (I added slightly more as the dough was a bit dry)

*Filling: About 200g - 250g lotus seed paste

1. In a large mixing bowl, knead all the ingredients together and gradually adding the water as needed. The dough should be a soft pliable dough but not sticky.
2. Cover the dough and let rest for 20 minutes.
3. Rinse the banana leaf with hot water and dab dry it. Cut out oval shapes slightly bigger then the kueh size. Brush with some vegetable oil on the surface.
4. Divide the dough into 30g each and roll round.
5. Flatten the dough, place about 1 heap tbsp of filling in the middle, then wrap and seal nicely.
6. Place in the mould which is slightly dusted with rice flour and press down with some pressure.
7. To unmould, knock on the side of the table and let the kueh gently fall out on to your palm.
8. Place kueh on greased banana leaf and arrange on a steaming tray.
9. Steam at medium high heat for 10 minutes.
10.Brush some cooked oil over the surface of the cooked kuehs to prevent sticking.


I'm submitting my post to Aspiring Baker #12: Traditional Kueh hosted by Small Small Baker this month.

Wednesday, October 26, 2011

Steamed Rice Cake (蒸米糕)

Today is a public holiday in Singapore as all our Indian friends celebrate Deepavali. For us, it's a good day to go out for a nice family lunch and R&R at home. Also gave myself an indulgence by arranging a masseur to our house for a full body rub ~ heavenly! Of course, there's some time for making some steamed rice cake. BUT, the supposedly quick & easy recipe became a pro-longed preparation. Sigh. Anyway, the colourful cakes brought along smiles and fond childhood memories, especially with extra coating of red sugar!


Steamed Rice Cake (蒸米糕)
(Recipe adapted from "Make Your Own Pastry - 自己做糕点, yields 14 cups)

Ingredients/ Method:
200g rice flour
200ml coconut milk
160ml boiling water
2 tsp double-acting baking powder
120g sugar (i reduced to 100g)
1/4 tsp vanilla essence

1. Sift rice flour and 1 tsp baking powder.
2. Combine rice flour and coconut milk and mix well.
3. Add boiling water, mix well and set aside to cool.
4. When cool, stir in 1 tsp baking powder and set aside for 1 hour.
5. Add sugar and vanilla essence in batter and mix well.
6. Line aluminium cups with paper and arrange on steamer tray. (I used small paper cups instead.)
7. Pour batter in cups until 90% full and leave to rise for 30 mins.
8. Steam over rapidly boiling water for about 15 mins.

Note: (1) The next time I make this, I would probably dilute the coconut milk with half portion water. (2) Add just a drop of your favourite colour to the batter (about 130ml).


I'm submitting my post to Aspiring Baker #12: Traditional Kueh hosted by Small Small Baker this month.

Sunday, October 23, 2011

Hakka pumpkin kueh (客家南瓜饼)

This post has 2-firsts for me, first time making lotus paste and first time making this type of kueh. Although making the paste is easy, I won't say so for the kueh. Because I'm not used to handling this type of sticky dough, I sorta regretted when I first started. Not wanting to waste my efforts and ingredients, I persevered and finally completed them. If you ask me whether I will do it again, I will hesitate and that's because the kueh turns out good despite the 'daunting' experience for me.


Homemade lotus paste
(Recipe adapted from Amanda's blog)


Ingredients/ Method
200gm white lotus seeds
160ml oil
120gm sugar (reduced from 180gm, but I still find it too sweet for me)
1tbsp condensed milk
1 tbsp honey
A pinch of salt

1. Soak pumpkin seeds in hot water overnight. (I bought my lotus seeds which green centre already removed. If fresh lotus seeds, please remove green centre.)
2. Wash and drain lotus seeds. Cook lotus seed with water till soft and tender.
3. Blend the lotus seeds till smooth.
4. Heat up a wok/pan, melt half the sugar until it turns golden brown in color.
5. Pour in blended lotus seeds, remaining sugar, oil and salt.
6. Cook over medium flame, stirring all the time until the lotus seed paste thickens.
7. Stir in honey and condensed milk. Continue stirring till paste leaves the side of the wok/pan.
8. Cool before use.


Hakka Pumpkin Kueh (客家南瓜饼)
(Recipe adapted from 汗牛养生馆 - 家常点心 yields about 20 pieces)


Ingredients/ Method
150gm glutinuous flour
100gm wheat starch/ tim sum flour (澄面粉)
500gm Pumpkin
100gm sugar (reduced to 80gm)
100gm homemade lotus paste

1. Deskinned the pumpkin and slice the pumpkin into small pieces.
2. Steam for 10mins on high, and mashed.
3. Add sifted glutinuous flour, tim sum flour and sugar into the mashed pumkin to form pliable dough.
4. Steam dough for 10 mins. Remove and allow to cool.
5. Divide dough into 30g each. Flatten dough and wrap with lotus seed paste. Roll to form a ball and light flatten. (The dough is quite sticky to handle, dust some dim sum flour on working surface and hand.)
6. Add some oil into wok. Pan fried till golden and ready to be served.


I'm submitting my post to Aspiring Baker #12: Traditional Kueh hosted by Small Small Baker this month.

Monday, October 10, 2011

Gourmet pizza

Following my earlier post on pizzas, I made another attempt again the following Sunday using another recipe posted by Batter Baker. This time, I bought my ingredients days ahead so that I can be ready before the children's class ended. Somehow, the timing didn't work out and only two of the pizzas were churned out by then. Something must be seriously wrong with my time management ;-(


These gourmet pizzas were made after 'consultations' with the two men in my house, cos they would be the main customers anyway. They are 3-cheeses, portobello & basil, and italian sausage pizza. The pizza dough is by Jamie Oliver.


Overall, the customers were happier with the outcome of the pizzas this time.


Pizza Dough, by Jamie Oliver
(Doubled the recipe of Batter Baker's, and made 4 x 7" thin pizza)

260ml lukewarm water
1tsp sugar
2tsp instant yeast
2tbs extra virgin olive oil
400g bread flour
1tsp salt

1. Sprinkle sugar and yeast over water. Set aside for about 10 min till frothy.
2. Pour yeast mixture and oil into flour and salt.
3. Knead till smooth and springy (about 20 min by hand, 10 min by machine).
4. Place the ball of dough in a large flour-dusted bowl.
5. Proof for about 30 min or till it doubles in size.
6. While you wait, prepare the pizza topping.
7. Generously flour your work surface.
8. Tip out the dough and flour the top.
9. Press or roll out dough to a 7" circle. If dough keeps springing back on you, let it rest for a few minutes.
10. Prick the dough with a fork (so the dough won't balloon in the oven).
11. Brush the pizza base with little olive oil (this is to prevent the base from becoming soggy.)
12. Spread pasta sauce generously on the pizza base.
13. Place dough on a pizza stone sprinkled with bread crumbs or cornmeal, or on a greased and floured baking pan.
14. Bake at 220 deg C for about 10min.
15. Remove from oven and top with your favourite ingredients.

Pizza Toppings
(for 4 x 7" pizza)

250g mozarella cheese
200g pizza topping cheese
Pasta/ Spaghetti sauce

3-Cheeses
(a) Mozarella cheese
(b) Pizza topping cheese
(c) Gouda chese

Portobello mushroom & basil:
(a) 1 pkt portobello mushroom, sliced & sauteed
(b) 1 pkt basil leaves

Italian Sausage
(a) 2 italian sausages
(b) Yellow & green capsicum

1. Spread half of mozarella cheese and followed by the ingredients.
2. Add the balance mozarella & pizza topping cheese.
3. Put back to the oven and continue to bake for another 10 mins at 220 deg C, or till brown.
4. Slice and ready to serve.

Wednesday, September 28, 2011

Our Sunday lunch

After seeing batter baker's half & half pizza, my hands were itching to make them too! Originally intend to make it for the kids' snack after class, but I took too long to do my 'marketing' in the morning. By the time I reached home, the class had almost ended and making the pizza from scratch took a slow-motion me a 2.5 hours. Undoubtedly, we had late lunch again! As we had a movie to catch, we had to literally take our half-an-hour afternoon nap straight after our lunch. Me can't survive without afternoon naps, especially on Saturdays and Sundays!


I've copied batter baker's pizza base recipe for my future reference, and doubled her recipe as well to make 2 pizza.


Pizza Base
Recipe for 1 thin 12" (30cm) pizza base.
(Slight modifications on the baking steps.)

120ml lukewarm water
1/2 tsp sugar
1 tsp instant yeast
2 tsp olive oil
200g bread flour
1/2 tsp salt

1. Sprinkle sugar and yeast over water. Set aside for 10 min till frothy.
2. Add in the rest of the ingredients and mix till a dough forms.
3. Knead till smooth and springy (about 20 min by hand, 10 min by machine).
4. Place the ball of dough in a large flour-dusted bowl.
5. Proof for about 30 min or till it doubles in size.
6. While you wait, prepare the pizza topping.
7. Generously flour your work surface.
8. Tip out the dough and flour the top.
9. Press or roll out dough to a 12" circle. If dough keeps springing back on you, let it rest for a few minutes.
10. Prick the dough with a fork (so the dough won't balloon in the oven).
11. Place dough on a pizza stone sprinkled with bread crumbs or cornmeal, or on a greased and floured baking pan.
12. Bake at 220 deg C for about 10min.
13. Remove from oven and top with your favourite ingredients.

Pizza Toppings
(for two 12' pizza)

250g mozarella cheese
200g pizza topping cheese
Pasta sauce (can refer to batter baker's, but being lazy I use the usual spaghetti sauce)

1st half:
(a) 1 canned pineapples, drained & cubed
(b) 150g Pinic ham, cut into small squares
2nd half:
(a) 1 pkt Shitake mushroom, sliced & sauteed
(b) 1 pkt basil leaves

1. Brush the pizza base with little olive oil (this is to prevent the base from becoming soggy.)
2. Spread pasta sauce generously on the pizza base.
3. Next, spread half of mozarella cheese and followed by the ingredients.
4. Add the balance mozarella cheese and put back to the oven and continue to bake for another 10 mins at 220 deg C, or till brown.
5. Slice and ready to serve.

Tuesday, September 13, 2011

Mini egg tarts

This is my second attempt to make egg tarts within 2 weeks using different recipes. The reason why I did not post it earlier is because the first attempt was a failure and I had to feed the bin. It was a dim sum style/ puff pastry type of egg tart that I tried, and using a recipe from a local magazine. I think I fail big time, both the pastry as well as the egg custard. I wonder how reliable the magazine recipe can be or is it because of my lack of skill in handling the puff pastry? Anyway the next time I'm going to make the dim sum egg tart will be using recipe from the reliable blogs; I've book-marked a few that look so good that you would want to eat them from the screen.


Now that lil Zak goes for his montessori class on every Sunday morning at my neighbour place, I had the luxury of time to do some baking. Further, I can share my bakes with my neighbours and their kids after their class. This helps in a big way as earlier I had 'problem' of finishing my bakes...kekeke. Thankfully, these egg tarts using recipe that I got from Cook.Bake.Love were very well received, and the little kids came back asking for more! I'd doubled the recipe and it produced 45 mini tarts and with about 15 tart cases left over, which I kept in the fridge unbaked.


Easy & Delicious Egg Tarts
(makes about 45 mini egg tarts)

Pastry
300g plain flour
2 tbsp custard powder
2 tbsp milk powder
1 tbsp sugar
50-60g egg (1 egg)
200g butter

Rub-in Method (cold butter) - I used this method
1. Cut cold butter into small cubes.
2. Combine flour, custard powder and milk powder and mix well.
3. With fingertip, rub in the cold butter, add sugar, mix well.
4. Add beaten egg, mix to form a soft dough (do not knead).
5. Wrap with cling wrap and refrigerate before use.

Easy Method (melted butter) - For reference only.
1. Melt butter.
2. Combine all dry ingredients and mix well
3. Add melted butter and beaten egg.
4. Using a pair of chopsticks mix to form a soft dough.
5. Wrap with cling wrap and refrigerate before use.

Filling
280g water
120-140g sugar
200g beaten egg (3 large eggs or 4 medium eggs)
80g evaporated milk
Few drops pure vanilla extract (optional)

1. Heat up water and sugar till sugar dissolved. Let cool.
2. Add beaten egg, evaporated milk and vanilla extract and mix well.
3. Sieve 3 times.

Assembly
1. Roll into ball and press the dough into tart moulds. (I did not measure the dough for each tart.)
2. Spoon in the fillings till 80% full. (I poured mine almost 100% full.)
3. Bake in preheated oven at 180C for 20 mins.

Monday, September 12, 2011

Mooncake or not?

These days the monthly Aspiring Bakers event is one that gave me the little push to continue baking 'something'. So far, the theme of each month had been very interesting and it really serve as a good on-line encyclopedia for all who loves baking. Kudos to Small Small Baker who initiated this splendid AB, and to all hosts who spent so much time and effort to compile all entries every month!

Being the 8th month of the lunar calendar, naturally it's Aspiring Bakers #11: Mid-Autumn Treats (September 2011) and hosted by Happy Home Baking. Of course, I'm submitting this post for this month's AB event. BUT....

Back to the title of this post.... I'm not very convinced that mine is a mooncake, though what I've "researched" from wikipedia skewed towards the answer "yes". What is a mooncake? Crust - can be chewy, flaky or tender, glutinuous rice, jelly. Filling - can be lotus seed paste, five kernels, durian, chocolate, etc. Shape - can be round, rectangular, piglet, cute cartoon characters, etc. Not wanting to do the snowskin mooncakes which I did previous years, and have not got the time to try baking traditional mooncakes, I did mine using 老婆餅 (wife's biscuit) recipe and shaped using the mooncake moulds/plunger that I just bought from Elyn of ShopnBake. The previous set of mould/plunger was given to my sis-in-law, and I only ordered this new set and collected on Sunday. You'll see how I always do my things at the last minute (oh no...)!


You will decide whether this is a Mooncake or not?


Anyway, Wishing all 中秋節快樂 or Happy Mid-Autumn Festival 2011!


Wednesday, August 31, 2011

AB #10 - Blueberry Cheese Tart

I'm beating the time to participate in the Aspiring Bakers #10 - Easy as Pie hosted by Janine of Not the Kitchen Sink. You see, I've only finally decided to bake the blueberry cheese tarts at the 11th hour (i.e 10.20pm to be exact!)Although I did prepare the blueberry fillings on Tuesday which is a PH, I didn't think I have the time to do any baking during the week.

Whilst writing this post, the tarts are still baking in the oven. I will be snapping some pictures later, do a quick edit and upload it here.


The blueberry cheese tart is the 2nd time I'm baking it (the last was June 2009). I didn't realise how time flies and without this blog to journal my baking journey, I would have thought that I did it just last year! That's a pretty long time for me to re-bake such a wonderful recipe.

In my haste of baking, I accidentally dropped and broke my beloved & sentimental mixer (heart-break as well). Told T about it and that I would have to throw it away, but he said that "something with sentimental value is for keep-sake though it can't be used anymore". Very true. I'm contemplating now.


Blueberry Cheese Tarts


(makes 36 mini tartlets)


Ingredients/ Method:


Pastry:
125g butter
50g fine granulated sugar
250g plain flour
1 egg yolk
1/2 tsp vanilla essence
1 tbsp COLD water

1. Sift flour and sugar into mixing bowl.
2. Rub butter into flour until resembles coarse crumbs (rubbing method).
3. Add in egg yolk, vanilla and water.
4. Shape dough into ball and refrigerate (20-30 minutes) before using** (before using, take out from fridge, wait for awhile until dough soften).
5. Place dough onto tart shells, and pooked the base with fork (this is to let the air comes out while baking).
6. Bake at 160-170'C for 10-15 minutes or until brown.

Blueberry Filling:
125gm fresh blueberries
1 tsp sugar

1. Bring blueberries and 1 teaspoon sugar to simmer in small saucepan over medium heat.
2. Cook, mashing berries with spoon several times and stirring frequently, until berries have broken down and mixture is thickened and reduced to ¼ cup, about 6 minutes. Transfer to small bowl and cool to room temperature, 10 to 15 minutes.

Cream Cheese Filling:
250g cream cheese
20g butter
50g fine granulated sugar
1 egg

1. Beat cheese, butter and sugar together until fluffy.
2. Add in egg and beat till well mix.
3. Pour mixture onto baked tart shells.
4. Spoon some blueberries or blueberry pie filling onto unbaked tarts, and use a toothpick to create swirls.
5. Bake at 170-180'C for 10 minutes.


Sunday, August 21, 2011

The best blueberry muffins & pancake

During my 3-weeks getaway in States, other than making lao po bing, I also had my hand on the Best blueberry muffins and soft fluffy pancakes. My original plan was to bake-like-crazy when I'm holidaying at my sis' place, if we had only stayed at her place. But we decided to have a week stay at her house "doing nothing", and another 2 weeks on road trip from central States heading westward to San Francisco. For the last decade that my sis left S'pore for States, this is our first time visiting her together with my dad & Zakris; my gf E tagged along as well. My regret is that my mum didn't get the chance to see the well-being of my sis in a far-away land, and I do not want to have another regret that my dad didn't get to do it too! It was definitely a good trip but it won't be the last for sure! I'm already planning another trip in 2013, and to see my 1 year+ niece then!

When I saw the big array of baking tins, tools, ingredients, spices, pots & pans etc left me & my friend in awe! Even the sugar and salt are particular! The kitchen is so well-equipped that you can bake anything almost anytime. For someone who don't cook at all before she left S'pore, it's a pleasant surprise!


The blueberry muffin recipe is highly recommended by my sis, and with the lemon-sugar toppings, they are luxurious to the bits. The only problem I had was the measurement used - cups, half stick butter, etc.


Blueberry Muffins
(Recipe adapted from Hooney's The Best Blueberry Muffins)
Makes 12 muffins.
Ingredients/ Method:

Lemon-Sugar Topping
1/3 cup sugar (I used Turbinado Sugar)
1 1/2 teaspoons finely grated zest from 1 lemon
Muffins
2 cups fresh blueberries, picked over
1 1/8 cups sugar plus 1 teaspoon
2 1/2 cups unbleached all-purpose flour
2 1/2 teaspoons baking powder
1 teaspoon table salt
2 large eggs
4 tablespoons (1/2 stick or 56.5gm) unsalted butter, melted and cooled slightly
1/4 cup vegetable oil
1 cup buttermilk (may substitute with 3/4 cup plain whole-milk or low-fat yogurt thinned with 1/4 cup milk)
1 1/2 teaspoons vanilla extract

FOR THE TOPPING: Stir together sugar and lemon zest in small bowl until combined; set aside.

FOR THE MUFFINS:
1. Adjust oven rack to upper-middle position and heat oven to 425 degrees F (or 218 deg C).
2. Spray standard muffin tin with nonstick cooking spray.
3. Bring 1 cup blueberries and 1 teaspoon sugar to simmer in small saucepan over medium heat.
4. Cook, mashing berries with spoon several times and stirring frequently, until berries have broken down and mixture is thickened and reduced to ¼ cup, about 6 minutes. Transfer to small bowl and cool to room temperature, 10 to 15 minutes.
5. Whisk flour, baking powder, and salt together in large bowl.
6. Whisk remaining 11/8 cups sugar and eggs together in medium bowl until thick and homogeneous,about 45 seconds.
7. Slowly whisk in butter and oil until combined.
8. Whisk in buttermilk and vanilla until combined.
9. Using rubber spatula, fold egg mixture and remaining cup blueberries into flour mixture until just moistened. (Batter will be very lumpy with few spots of dry flour; do not overmix.)
10. Use ice cream scoop or large spoon to divide batter equally among prepared muffin cups (batter should completely fill cups and mound slightly).
11. Spoon teaspoon of cooked berry mixture into center of each mound of batter.
12. Using chopstick or skewer, gently swirl berry filling into batter using figure-eight motion.
13. Sprinkle lemon sugar evenly over muffins.
14. Bake until muffin tops are golden and just firm, 17 to 19 minutes, rotating muffin tin from front to back halfway through baking time.
15. Cool muffins in muffin tin for 5 minutes, then transfer to wire rack and cool 5 minutes before serving.


As we had to settle our own breakfast during the first week of our stay (both my sis & bro-in-law were out at work on some days), we created "chaos" in the kitchen. One of the brekky items I prepared is the soft & fluffy pancakes. I like how easy it was to prepare and the result is real good. This is a keeper!

Fluffy Pancakes
Recipe adapted from Wen's Delight)

Ingredients/ Method:
150g Self raising flour
50g Sugar
1/4 tsp salt
110ml Fresh milk
1 egg
1 tbsp Corn oil

1. Mix flour, sugar and salt in a mixing bowl.
2. Add in egg, milk and corn oil, use a hand whisk to stir well.
3. Spoon batter onto a non-stick pan (without oil) to pan fry until golden brown on both sides.
4. Serve hot with maple syrup/jam.


Lao po bing (Wife's biscuit) & POP

This is my longest break from blogging and I was almost contemplating to neglect it totally. I'm so sorry if anyone is waiting for an update on this 'pathetic' blog, that is if there is anyone LOL. I can't promise a regular posting but will try my best to keep my hobby going and this blog alive.

Actually, there are a couple of recipes that I will be posting, but this Lao Po Bing "step-by-step" will take priority as it's a long overdue request & promise. I only managed to get it done whilst I was on my 3-weeks holiday at my sis' place in US. This recipe originated from Florence's Do What I Like, but it seems that the post cannot be found in Florence's blog anymore.


Ingredients/ Method:
Water dough
100g cake flour
25g icing sugar
25g butter (cubed) or shortening or margarine or lard
40g water
Oil dough
100g cake flour
45-50g shortening or lard
Filling
50g candied winter melon, chopped to bite size
55-60g castor sugar
70g commercialised glutinous rice flour (koh fun)
18g shortening
15g white sesame seeds, roasted
12g dessicated coconut (can be omitted)
120g boiled drinking water, room temp.
Egg Wash
1 yolk + 1 tsp water + a pinch of salt


1. Pastry:
Water dough: Rub butter into sieved flour and icing sugar till breadcrumb-like. Add in water till a pliable dough is formed. Cling wrap dough and rest for 30 to 45 mins. Divide dough into 12 equal portions.


Oil dough: Rub shortening into flour till well mixed. Cling wrap and leave it aside to rest for 30 to 45 mins. Divide dough into 12 equal portions.


2. Filling: Put all ingredients into a big bowl, mix till well combined. Divide filling into 12 equal portions.


3. Flatten a piece of water dough. Place a piece of oil dough in the centre of water dough.

4. Wrap oil dough with water dough.


5. Press and roll out dough into a longish flat piece with a rolling pin. (I didn't do a good job here.)

6. Roll it up like swissroll style.

7. Turn the dough 90 degrees.


8. Roll it into a longish flat piece.
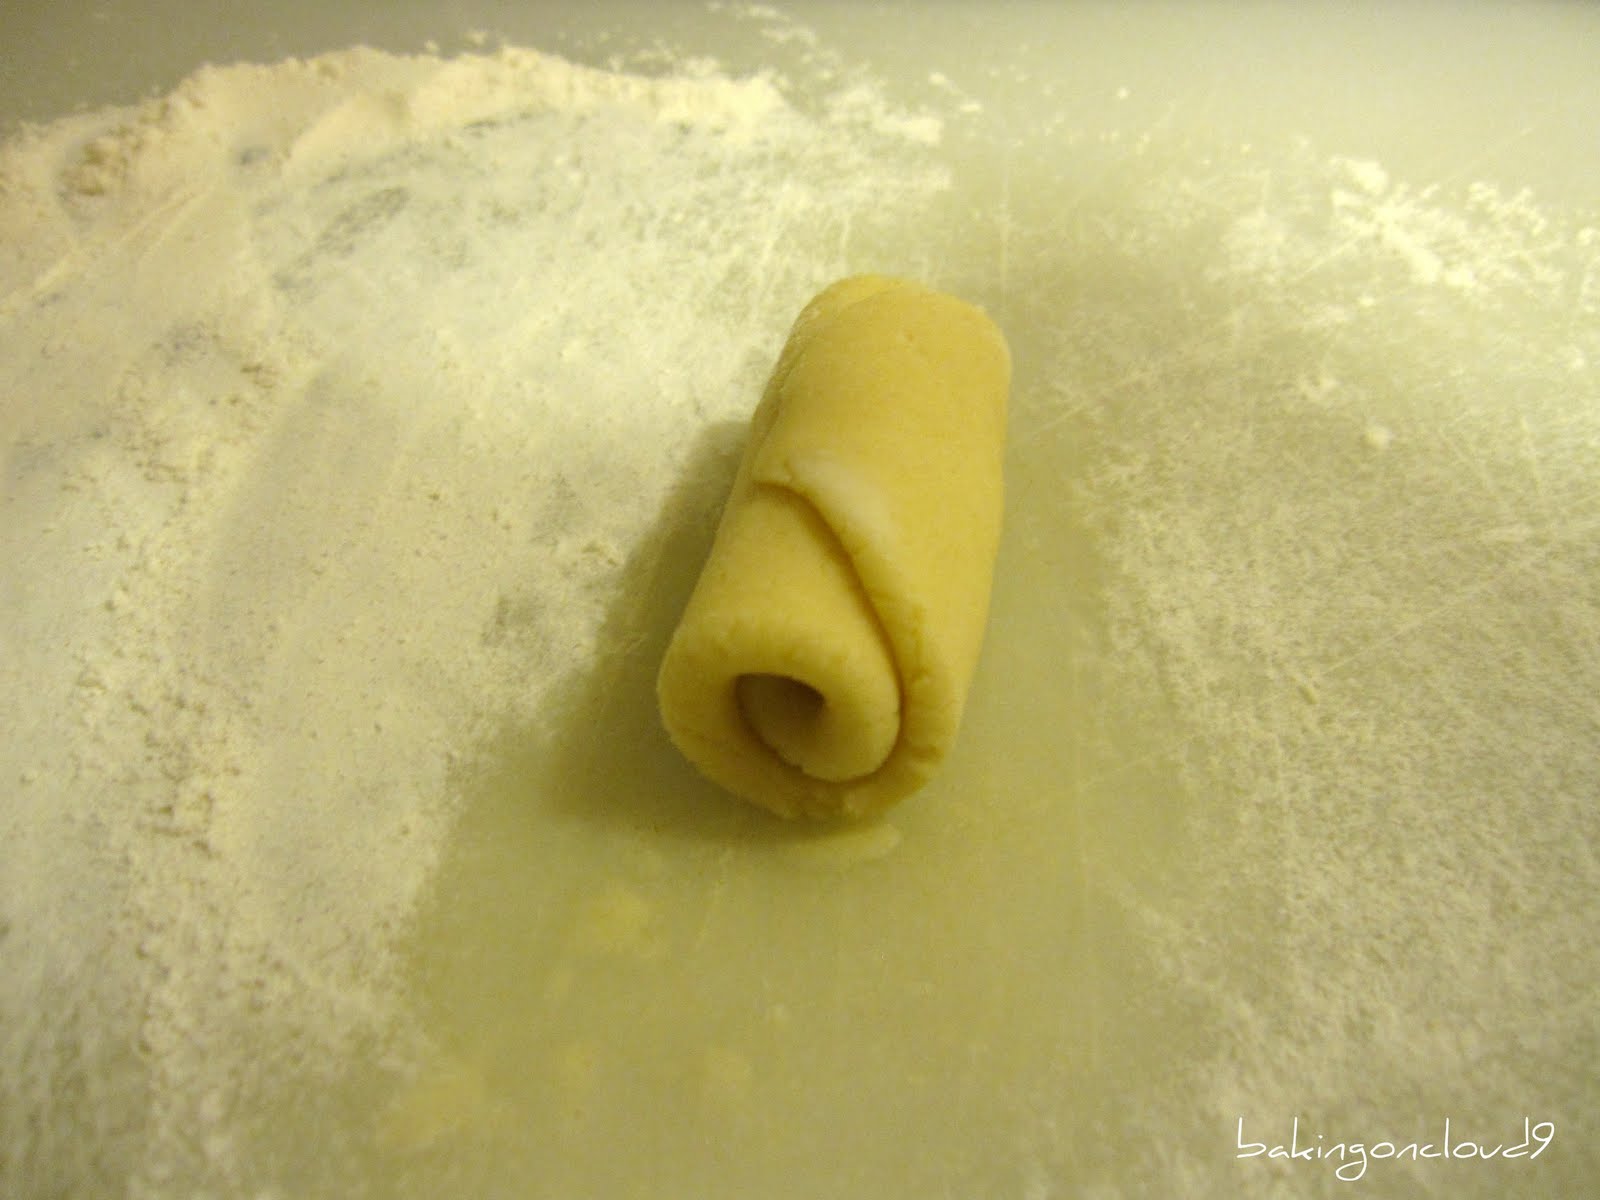
9. Roll it up like swissroll style again.

10. Pinch the 2 side edges.

11. Using hand, shape it into a flat circular shape.

12. Place the filling in the centre of the flatten dough.

13. Wrap up the filling with the dough. Ensure dough completely covers the filling.

14. Using hand, roll the dough to make it like a round ball. Then flatten it with a rolling pin. Egg wash the dough.

15. Bake in pre-heated oven at 200 deg C for 20 to 25 mins or until golden brown.


POP (Pig Out Party)

Just last Saturday, I attended my 2nd bloggers' party which was initiated by Eelin and it was held at Jo's cosy home. In fact, I'm surprised initially with the invitation but very happy that I got invited. Since my baking bug hasn't returned, I'd chosen to bring tau suan instead of baked stuff. All my other blogger friends put in so much efforts and brought along super sumptuous and tempting homemade TLC cakes, puffs, ice-cream, pizza, fried fritters, chwee kueh, and alot more. The gathering was very enjoyable and I look forward to another one soon. I promised to do a proper dish the next time! You can visit the wonderful blog of my friends here, plus many of them have put up pictures that will make you salivate & envious of our POP party.

Eelin of The batter baker
Jo of Sugar & everything nice
Edith of Precious moments
Jane of Passionate about baking
Doris of Tested & tasted
Jess of J3ss kitch3n
Zhou Yuan of Baking library
Grace of Kitchen corner
Bee Bee of Honey bee sweet
Cathy of Cathy's joy