Saturday, March 5, 2011

4 years ago....

4 years ago and on this day and time, I was still in the delivery room and just had the first hug from my lovely boy! Yes, Zakris is turning 4 today and we had a simple celebration at home with our family and relatives.

The day before, we had an early celebration at the school with all his friends from nursery 2. He was so happy and excited, looking forward in anticipation to both the celebrations at school and home. How he has grown from without knowing what is birthday to one who will ask for birthday parties! He knows how to say nice things to mummy to make me happy, give me hugs & kisses and say I love you <3>

Every year, I would ask my boy the cake he wishes to have for his birthday. Although a very young boy, he is someone who has a mind of his own and we always encourage him to make his own decisions . This year theme is supposed to be a bus depot cake as wished, but it is really too tall an order for me. I 'negotiated' for just a bus cake, no depot, and he agreed with having just 2 buses - one double-deck bus bus and a single-deck bus. As usual, I would keep thinking for weeks on the design and how to do it, what sponge cake recipe to use, what flavours, fondant, buttercream or whipped cream, etc. There are always so many ideas and thoughts running through my head before finally deciding on the Cake to make.


No matter how much planning, hiccups are very common for me. First, my 2 batches of lemon and greentea macarons totally failed and went to the bin - scatterbrain me forgotten to sift the icing sugar and almond meals :-( Then, when preparing the sponge cake, my egg yolk mixture became scrambled eggs...oh no! Followed by, I mis-read the sponge cake recipe resulting in a smaller sponge base, hence no 2 buses (sorry Zak), only one bus - a long/ bendy one. Next, I mis-calculated the amount of buttercream needed and I only managed to pipe one-third of the cake. Omg! I didn't want to start preparing the buttercream all over again as time is running short, and after some hesitation, I decided to use whipped cream instead for the remaining piping. Luckily and finally, I was able to present the cake to my lovely birthday boy <3>
Plain Sponge Cake
(Recipe adapted from Kitchen Corner and visit Honey Bee Sweets for very useful step-by-step pictures)
Ingredients/ Method:
40g unsalted butter
100g egg yolk (about 6 eggs)
20g caster sugar
160g egg white
75g caster sugar
55g plain flour

1. Prepare a baking tray (11" x 14") lined with baking paper. Melt the butter than set a side to cool.
2. Using electric mixer, whisk the egg yolks with sugar in a double boiler until thicken and pale. 3. In another bowl whisk the egg whites with caster sugar until stiff peak.
4. Fold the egg yolks into the egg whites then gently fold in the sifted flour.
5. Pour some mixture (4) into a clean bowl then mix in the melted butter until well combine. Pour back into the mixture of (4) and mix gently until everything well combine.
6. Pour the batter into prepared baking tray and spread evenly.
7. Bake at 180C for 12 - 14 minutes. Be careful not to over bake it.
8. Remove the cake from the baking tray immediately when it is out from the oven and place on a wire rack to cool. Tear out the side of the baking paper and let it completely cool down and ready to use.


Decorate
1 punnet of strawberries
Swiss meringue buttercream

1 cup whipping cream + 3 tbsp icing sugar (sifted) **

**Whipped cream is used because I don't have enough buttercream :p.


I am submitting the Strawberry Long Bus Cake to Aspiring Bakers #5: Fruity March hosted by http://bakericious.blogspot.com/.


Other than baking the birthday cake, I also prepared Refreshing lemongrass drink shared by Jane of Passionate about Baking. The drink is really refreshing and good, but I prepared in "limited edition" so not all guests get to try it. I must say this is really a keeper!


Refreshing Lemongrass Drink
(Recipe adapted and slightly modified from Passionate about Baking)

Ingredients/ Method
8 Lemongrass, chopped and mashed lightly
3 litres water
10 tbsp Sugar
2 Lipton tea bags

1. Boil lemongrass and water in a pot.
2. Remove from heat.
3. Add tea bag to infuse, followed by sugar.
4. Remove tea bag after about 10 mins.
5. Let the lemongrass infused in the water overnight as it cooled.
6. Strained into a bottle and refrigerate.
7. Serve with ice.


Wishing Zakris a very Happy Birthday & 健健慷慷, 快高长大!

Sunday, February 27, 2011

Steam Carrot Cake (萝卜糕)


I had another go of this carrot cake recipe which was originally shared by Honey Bee Sweet. This time, I added more of everything - radish, mushroom, dried scrimp, chinese sausage (腊肠), but forgotten I had to increase the liquid and flour and as a result it was more 'densed' with ingredients! Nevertheless, it still tasted good... we love it steamed than fried. Healthier choice and less cleaning to do without the frying (",)

Ingredients/ Method
(Adapted and modified from Honey Bee Sweet's Dim Sum Fried Carrot Cake)

Set A:
650g white carrot / turnip, peeled and shredded
340ml water

Set B:
5 shallots, peeled and chopped fine
3 tbsp dried shrimp, soaked and cut into smaller bits
7 dried mushroom, soaked in water till soft, then cut into small chunks
3 Chinese sausage, casing removed and cut into small chunks
3 tbsp vegetable cooking oil

Set C:
155g rice flour
15g corn flour
15g wheat starch powder
340ml chicken stock (or use 340ml water + 1 chicken bouillon cube)
  1. In a large pot, add shredded carrot and water and start boiling mixture. Cook for about 5 to 8 minutes till the vegetables are slightly cooked. Do not throw about the water, leave the whole mixture together and set aside till needed.
  2. In a saute pan, add vegetable oil at medium heat and stir fry the shallots till fragrant. Then add in Chinese sausage, mushrooms and dried shrimp. Cook mixture for a couple minutes then add the carrot water mixture in. Let it stew for about 8 to 10 minutes and then off the fire. Set aside till needed.
  3. In the meantime, prepare the steamer with boiling water and grease a 8" round steam pan lined with parchment paper.
  4. In a large mixing bowl, add rice flour, corn flour and wheat starch. Pour in the chicken stock and mix well. Then pour the carrot mixture into the flour mixture and stir well. The mixture will be lumpy and thick.
  5. Pour it into the prepared steamer pan and let steam on medium heat for about 40 minutes till cooked.
  6. Remove from steamer and let cool completely before cutting into it.
Note:
a) Remember to increase the liquid and flour to have more kueh than ingredients!
b) More shallots to be added as requested by T.
c) I did not use parchment paper, instead I oiled the pan so that it will not stick.


As I made this on Saturday afternoon, I re-heated the the carrot cake by steaming them again for about 5 mins this morning. Slice and serve for our simple breakfast today!

Monday, February 14, 2011

Strawberry macarons

Love In The Air ....
Happy Valentine's Day


With my success with the chocolate macarons, I'm gearing myself to try out other flavours and colours of these lovely macarons.

However, without proper planning and research, it spelt trouble and failure! My attempt to replace the cocoa powder with cranberry sauce only produced flat meringue, not macarons. I first blended the almond powder and icing sugar, set aside, and followed by blending the cranberry sauce. Few mistakes, (a) cranberry sauce is not blended fine enough (there are still bits of cranberry), (b) blending almond power mixture and cranberry sauce produced very gluey batter, which make it very difficult to fold into the egg white without deflating all the bubbles, (c) continue to pipe and bake even though the batter look very unpromising.

I then proceeded to read more blog posts about macarons, and came out with the Strawberry Macarons. I was not very hopeful initially, but the outcome turned out acceptable. The only complaint that I have is the faint colour of red, and the not-so-smooth dome. Anyway, Love is not always smooth, there are ups & downs. More trials & errors in macarons, and practice make perfect!


Strawberry Macarons

Ingredients/ Method:
(Makes about 36 pieces or 18 sandwiches)

50g icing sugar
37.5g almond powder
1 large egg white, room temperature (about 36g each)
32.5g caster sugar
2 -3 drops of strawberry emulco

1) Preheat oven to 150 deg C.
2) Line 2 baking sheets with parchment paper and have a pastry bag with a plain tip (about 1 cm) ready.
3) Grind together icing sugar with almond powder so there are no lumps, using blender or food processor.
4) In a bowl of standing electric mixer, beat the egg white until they are foamy. Add sugar in 3 batches and whip egg white until very stiff and firm.
5) Add in strawberry emulco to the egg white mixture and beat until colour evenly blended, about 5 seconds.
6) Carefully fold in the dry ingredients in two batches into the egg whites mixture using the mixer on low-medium speed, about 5-10 seconds . When the mixture is just smooth and there are no streaks of egg white, stop mixing and scrape the batter into the pastry bag (standing the bag in a tall glass helps if you’re alone).
7) Pipe the batter like a v-shape on the parchment-lined baking sheets. Evenly spaced one-inch (3 cm) apart.
8) Rap the baking sheet a few times firmly on the counter top to flatten the macarons, then bake them for 15-18 minutes. Let cool completely then remove from baking sheet.
Filling can be anything, I'd used nutella and peanut butter this round.

Note:
1) Smooth the piped batter if rapping the baking sheet did not give a smooth dome/ surface.
2) There's no need to rest the macarons before baking. I put them straight into the oven after they are being piped.
3) So far I use Glad's baking paper for most of my baking and these macarons can be easily removed using them too.
4) Add more colouring or emulco to have more pretty/ obvious colour.

I'm submitting this to Aspiring Bakers #4: Love In The Air which is hosted by Ellena of Cuisine Paradise for this month's theme.

Sunday, February 13, 2011

Chocolate macarons


With all the CNY baking, I've got so many egg whites left. For the past few years, these egg whites will be thrown away (*heart-ache*) cos I don't how else I can do with them. This time, I've put them in good use, in fact, I'm very happy with the outcome!! Macarons!! However, I did failed on the first attempt using another recipe and I was like, "...well, these egg whites would have gone to waste anyway ;( " I've read of many failed stories, and that macarons are not the easiest to bake. I agree and disagree. Why? Depends on the recipe, I would say.


My first failed attempt! No feet & the macarons cannot be
removed from the parchment paper. Only "empty" shells left.


Through my sis's close buddy, whom we got closer because of our baking interest, she recommended me an almost fail-proof chocolate macaron recipe by David Lebovitz. I would recommend to anyone who wants to try out macarons! When the macarons came out from the oven, I can see the nice little feets, shiny & firm dome! Happy!


Whilst filling up the macarons, Zakris took one and said it's nice. Returned to the kitchen and took another 2 more, followed by saying it's very nice! Even T commented that it's nice too! Very happy! I've to add that Zakris has tried more macarons than us, but I think he's basically attracted to the arrays of colour and these super-sweet biscuits. I'm not as sweet-toothed though.

Chocolate Macarons
Ingredients/ Method:
100g icing sugar
50g almond powder
25g unsweetend Dutch-process cocoa powder
2 large egg whites, room temperature (about 36g each)
65g caster sugar
1) Preheat oven to 180 deg C.
2) Line 2 baking sheets with parchment paper and have a pastry bag with a plain tip (about 1/2 inch - 2cm) ready.
3) Grind together icing sugar with almond powder and cocoa power so there are no lumps, using blender or food processor.
4) In a bowl of standing electric mixer, beat the egg whites until they are foamy. Add sugar in 4 batches and whip egg whites until very stiff and firm.
5) Carefully fold in the dry ingredients in two batches into the egg whites mixture with a rubber spatula. When the mixture is just smooth and there are no streaks of egg white, stop folding and scrape the batter into the pastry bag (standing the bag in a tall glass helps if you’re alone).
6) Pipe the batter on the parchment-lined baking sheets in 1-inch (3 cm) circles (about 1 tablespoon each of batter), evenly spaced one-inch (3 cm) apart.
7) Rap the baking sheet a few times firmly on the counter top to flatten the macarons, then bake them for 15-18 minutes. Let cool completely then remove from baking sheet.

Filling
1 portion of Nutella
1/3rd portion of cranberry sauce

1) Mix well and spread on the macarons.


Note:
1) I use Van Houten cocoa powder instead as this is what I had in my kitchen.
2) I bake the macarons at 150 deg C.
3) There's no need to rest the macarons before baking. I put them straight into the oven after they are being piped.
4) As I have problem using the spatula, I used my electric mixer - balloon whisk - to mix the dry ingredients with the egg whites. This takes about 5 seconds on low-medium speed.
5) So far I use Glad's baking paper for most of my baking and these macarons can be easily removed using them too.
6) My piping tip is rather small (less than 0.5cm) and they works well.
7) I piped the batter about 1.5cm as I think small macarons are more cute.

Saturday, February 12, 2011

Cranberry butter cake


Using my home-made cranberry sauce, I made a cranberry butter cake. This was baked on the late night of 2nd day of CNY as we were initially expecting guests to our humble home on the 3rd day of CNY. However, there was a last minute change and we adjourned to our aunt A & uncle D house instead, and we brought the cake along. Everyone loves this cake!


Cranberry Butter Cake

Ingredients/ Method:
225g cake flour
1 tsp baking powder
1/2 tsp baking soda
1/2 tsp salt
85g unsalted butter
150g sugar
2 eggs, beaten
1 cup non-fat unsweetened yogurt
1 tsp vanilla essence
90g cranberry sauce

1) Preheat oven to 180 deg and lined a 8 inch round tin.
2) Sift together cake flour, baking powder, baking soda and salt.
3) Cream the butter and sugar until light and creamy. Dribble the eggs slowly about 1 tbsp at a time, beating constantly for about 2 mins.
4) On LOW speed, beat in 1/3 of the flour mixture until just combined. Beat in 1/2 of the yogurt. Then beat in 1/2 of the remaining flour mixture, followed by the remaining yogurt, and vanilla essence. Finally beat in the remaining flour mixture.
5) In a separate bowl, scoop about 1/4th of the batter and mix well with cranberry sauce.
6) Pour remaining batter into prepared tin. Add dollop of cranberry batter into main batter and create swirls using knife.
7) Bake for about 40-50 mins till skewer inserted comes out clean.
8) Cool in pan for 5 mins. Unmould and cool completely.


Note:
1) I will probably add another 30g more of cranberry sauce the next time.
2) I will pour half of the remaining batter and add dollop of cranberry sauce, and then pour the balance batter and add cranberry sauce again to have a more even distribution of cranberry sauce in the cake.

Wednesday, February 9, 2011

Cranberry sauce


I've bought a punnet of fresh cranberries thinking of adding them to my fruits yogurt, but these are way too sour. I recalled seeing an easy cranberry sauce recipe before and decided that I would make them in order to "salvage" these cranberries. The fresh cranberries were put in the freezer and after more than 2 weeks, they still look "fresh"!

The steps are really easy but the results are not compromised. I'm very happy with how the sauce turn out so pretty & yummy, and I'm already thinking of making other jam using blueberries (as these are much cheaper than cranberries ...kekeke).


Ingredients/ Method:
(Recipe is halved as I've got only 170g cranberries)

100g caster sugar
130ml water
170g fresh cranberries

1. Bring water and sugar to a boil in a saucepan.
2. Add cranberries and return to a boil.
3. Reduce the heat and boil gently for about 10 minutes, stirring occasionally, till the cranberries have burst.
4. Let stand to cool completely at room temperature. The mixture will thicken as it cools. Store sauce in refrigerator for up to a week.


Stay tuned to see what I've done with these pretty cranberry sauce!

Saturday, January 22, 2011

Special Melting Moments

Today is a activities-filled day! At the repeated request of my boy, he wanted to take the train from our place to Changi Airport... nothing special if you are not staying in the farthest north of Singapore. I didn't really timed the journey, but I think it took at least 1.5 hours including the feeder service from my house to the MRT station. The return trip was another train and super long bus trip back from Changi Airport back home. Really a B.M.W. (bus.mrt.walk) day! Although it was pretty tiring, I really cherish and love these moments. Our conversation whilst in the sky train:-

Me: Are you happy today?
Zakris: I am happy!
Zakris: Mummy, are you happy?
Me: I'm happy because you are happy :-))
Zakris: Why?
Me: B'cos I love you <3<3<3>

I thought I would be too tired to do any baking today, but my energy level went up when I reached home. So here's another recipe which I'm trying from Agnes Chang's I Can Bake.... Special Melting Moments. Another easy and no-fuss (i.e. no mixer required) recipe which yield yummy & very delicate morsels. And these are made especially special because my darling helps with the mixing and piping :-))


Special Melting Moments
Recipe adapted from Agnes Chang's I Can Bake

Ingredients/ Method:
200g butter
80g icing sugar, sifted
1 tsp vanilla essence
1/4 tsp salt
120g self-raising flour, sifted
120g corn flour, sifted
1. Cream butter, icing sugar, vanilla essence and salt using spatula till just combined.
2. Add self-raising flour, corn flour and mix into soft dough.
3. Spoon mixture into a piping bag fitted with a big star nozzle. Pipe onto a greased baking tray to form into the shape of rosette.
4. Bake in a pre-heated oven at 170 deg C for 15 - 20 mins till light golden brown.
5. Cool on rack, sprinkle some icing sugar on top if desired.
6. Store in air tight tin before serving.

Note:
1. I reduced the icing sugar to 60g, sweetness is just nice for me.
2. As usual, I used my favourite pure vanilla bean paste.
3. I baked the cookies at 15 mins.
4. I sprinkled snow powder on some of the cookies but I think they look and taste better without them.
5. The next time I baked, I may want to add a bit of red cherries to make these cookies look brighter and cheery.
(Updated 23.1.2011: My relatives tried these but they don't fancy this cookies. General comment is that it's very salty. To omit salt or use unsalted butter the next time if I'm trying this recipe again.)


Melting Moments dusted with snow powder.

I'm submitting this to Aspiring Bakers #3: My Favourite CNY Cookie, hosted by j3ss kitch3n.


Sunday, January 16, 2011

Daisy Mocha Cookies

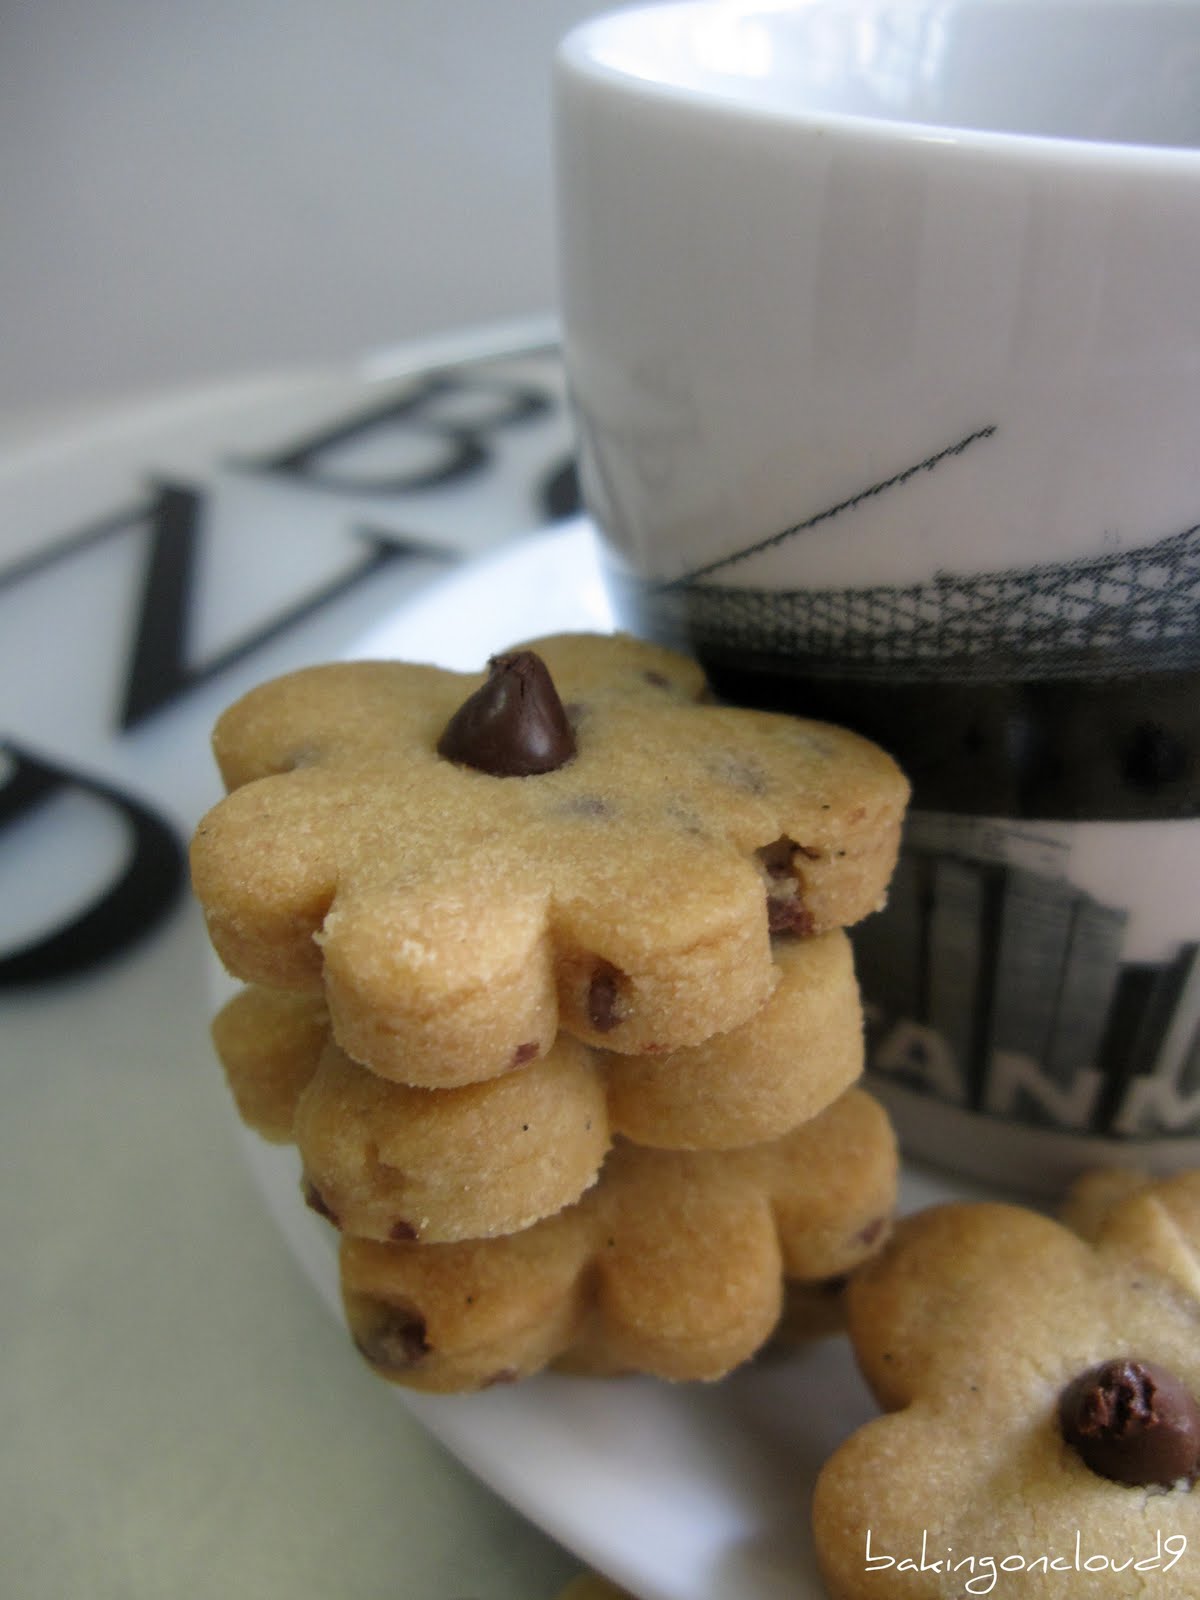
Another CNY cookies that I made today - Daisy Mocha Cookies, the first recipe that I tried from Agnes Chang "I Can Bake" cookbook. Personally I'm not a cookie-person, and usually I don't pay much attention to the cookie section of any cookbooks. If you were to notice, I hardly bake cookies but during this CNY season, it seems that I'm going to bake more cookies than ever ;-))


The recipe is very easy to prepare, and only require a mixing bowl and spatula.

Daisy Mocha Cookies
Recipe adapted from Agnes Chang "I Can Bake"

Ingredients/ Method:
(A) 250g butter
120g castor sugar
1 egg yolk
1 1/2tsp coffee paste

(B) 420g plain flour, sifted
60g chocolate rice

Decoration: Some chocolate chips

1) Put all ingredients A into a mixing bowl and cream till well combined.
2) Mix in ingredients B and form into a firm pliable dough.
3) Place the dough in between 2 layers of grease-proof paper and roll it to 3mm thick.
4) Cut with daisy-shaped cookie cutter and arrange the shapes on a greased baking tray. Decorate each centre with a chocolate chip.
5) Bake in pre-heated oven at 180 deg C for about 15 - 20 mins, till lightly brown. Leave to cool before storing.

Note:
1) I reduced the sugar to 100g and level of sweetness is just right for me.
2) I replaced the coffee paste with 1 1/2tsp hot water and 2tsp nescafe granules, as I didn't want to buy the coffee paste which I know I will hardly use.
3) Work on a small portion of dough at a time, and put the remaining dough in the fridge. It's much easier to work with the dough when they are just out of the fridge.


Verdict: The cookies are crunchy & crispy, the coffee taste is mild and not over-powering. For a non-cookie person, I don't mind eating them at all. T prefers this over the Sugi cookies.

I'm also submitting this to Aspiring Bakers #3: My Favourite CNY Cookies hosted by j3ss kitch3n.

Saturday, January 1, 2011

Nutella banana squares


The last thing I did in 2010 and first thing in 2011 is this nutella banana squares.... nothing elaborate and in fact a recipe which I tried before. Except that previously i baked in a muffin cup and it had a streusel topping, I decided to make mine in squares and slather lots of nutella and put on a cheery-red raspberry :)) Baking the banana cake was a breeze but I did have a tough time cutting up them in squares of 4cmx4cm as the nutella kept sticking on the knife. In the end, it was so messy that the last 2 pieces of squares was almost beyond recognition ;0

*P.S. The main reason for baking this was because of the very riped mini bananas sitting in my kitchen, and screaming to be eaten or else to be fed to the bin!

Happy holiday!

Happy eventS

Before I start blogging about my bakes & such in 2011, I want to complete this post about the happy eventS that happened in 2010.....

My Madagascar Vanilla Beans - one whole packet of fresh vanilla beans! ..... and


One big bottle of Nielsen-Massey Pure Vanilla Bean Paste - 944ml! ......


...... I think these are going to last me for many good years of baking!

However, the anxiety of waiting and happiness of receiving these vanilla bean (paste) does not beat seeing my dearest sis, who's residing in States, once again! Now, I'm looking forward to my trip to visit her this year ;-))


02102010 - These were cute little wedding cupcakes that I made and received positive feedbacks, there were some "ohhs" and "wows" .....


.... but what made me much happier is that my youngest brother has finally tied the knot!! I believe my mum would be the happiest at wherever she is now ;-))


To end our year 2010, we had dinner at Tims Restaurant & Cafe - a no-fuss place that served good food ....

From left to right: Cream of Asparagus with roasted almond, Chicken caesar salad, Oyster rockafellas


Fish & Chips


NZ Ribeye topped with sauteed pacific clam with black pepper sauce


Grilled lobster & panseared cajun spiced salmon fillet with basil cream sauce


Desserts: Blueberry cheesecake & strawberry ice-cream

I'm counting my blessings to be surrounded by many loved ones and good friends. Of course, there were many other happy, not-so-happy, ups&downs in 2010, but with a beginning of new year 2011, the goods will be remembered & the bad be bygones, everything will be refreshed. I'm wishing EVERYONE a very happy, healthy and smooth sailing year ahead! Cheers o(oO)o